The world produces over 380 million tons of plastic waste every year, with around 50% of it destined for single-use purposes. This staggering amount of waste not only crowds our landfills but also infiltrates our oceans, threatening marine life and polluting our ecosystems.
What if you could be part of the solution right from your kitchen? One of the simplest yet most effective actions you can take is to switch to beeswax food wraps, an alternative that leverages the natural uses for beeswax to combat plastic pollution.
These sustainable wraps are not just a nod to eco-friendliness. They offer a practical solution to everyday problems faced by environmentally conscious individuals looking to make a tangible difference. Read on to learn how you can create and use these versatile wraps to lead a greener lifestyle.
Why Choose Beeswax Wraps?
Besides being eco-friendly, beeswax wraps are also safe for food storage. They don’t contain the harmful chemicals often found in plastic wraps which makes them a healthier choice for you and your family.
From a financial perspective, beeswax wraps are cost-effective. While the initial investment in materials may be higher, the longevity of these wraps means you will save money over time.
You won’t need to keep buying plastic wraps, and your beeswax wraps can last for up to a year with proper care. This makes them a smart, economical choice for anyone looking to cut down on waste and save money.
Materials Needed
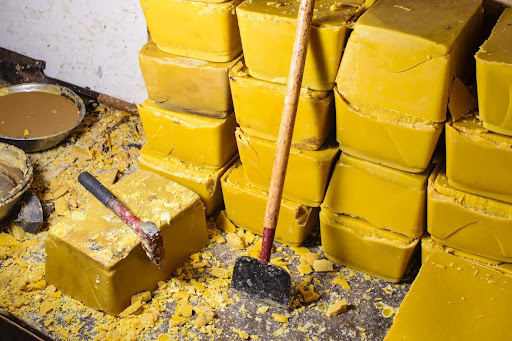
To make beeswax wraps at home, you need a few basic materials. First, you’ll need beeswax pellets, which you can find at health food stores or online. Beeswax is the key ingredient because of its natural properties, which make it sticky enough to wrap around food and keep it fresh.
Next, you’ll need cotton fabric. Organic cotton is best, but any tightly woven cotton fabric will do. The fabric needs to be pre-washed and cut into the sizes you want for your wraps.
You’ll also need jojoba oil and pine resin. Jojoba oil helps keep the wraps pliable, while pine resin adds extra stickiness. Both of these ingredients can be found at natural food stores or online.
Finally, you’ll need parchment paper and an iron or an oven to melt and distribute the beeswax mixture evenly on the fabric. With these materials in hand, you’re ready to start making your own beeswax wraps.
Step-by-Step Guide to Making Beeswax Wraps
Begin by cutting your cotton fabric into squares or rectangles. Common sizes are 8×8 inches for small wraps, 12×12 inches for medium wraps, and 14×14 inches for large wraps.
Preheat your oven to 200 degrees Fahrenheit if you’re using the oven method. Line a baking sheet with parchment paper and place your fabric on top.
Melting the Beeswax
To melt the beeswax, combine beeswax pellets, jojoba oil, and pine resin in a double boiler. Use about one tablespoon of beeswax, one teaspoon of jojoba oil, and one teaspoon of pine resin per wrap.
Stir the mixture until everything is melted and well combined. This usually takes about 10-15 minutes.
Applying the Beeswax
Once the beeswax mixture is melted, use a brush to apply it evenly onto the fabric. Make sure to cover the entire surface of the fabric.
If you’re using the oven method, place the baking sheet with the fabric into the oven for about 5 minutes, or until the beeswax is fully melted and absorbed into the fabric. If you’re using an iron, place another piece of parchment paper on top of the fabric and iron over it to allow the heat to melt the beeswax into the fabric.
Setting the Wrap
After the fabric is saturated with beeswax, remove it from the oven or iron. Hold the fabric by the corners and wave it in the air for a few seconds to let it cool and harden.
Once it’s cool, your beeswax wrap is ready to use. The wrap should be slightly sticky to the touch, allowing it to cling to itself and to the surfaces it covers.
Tips for Using and Maintaining Beeswax Wraps
Beeswax wraps are versatile and can be used to wrap sandwiches, cover bowls, and store fruits and vegetables. To use, simply mold the wrap around the item you want to cover. The heat from your hands will help soften the beeswax and make it easier to shape around the food.
To clean your beeswax wraps, wash them in cool water with a mild dish soap. Avoid using hot water, as it can melt the beeswax. Hang them up to air dry. With proper care, your wraps can last for up to a year.
Troubleshooting Common Issues
If your beeswax wraps aren’t as sticky as they should be, it might be due to an uneven distribution of beeswax. To fix this, you can remelt the wrap and apply more beeswax mixture.
If your wraps become too sticky or start to flake, it may be because they were exposed to too much heat or harsh cleaning agents. In this case, you can try re-coating them with a fresh layer of beeswax mixture.
Alternatives and Variations
If you prefer a vegan alternative to beeswax wraps, you can use plant-based waxes such as candelilla wax or soy wax. These alternatives work similarly to beeswax and can be used in the same proportions.
Adding essential oils like lavender or lemon can give your wraps a pleasant scent and add some antimicrobial properties.
For those interested in the wine industry, many a cork manufacturer has explored uses for beeswax as corks for wine bottles. This natural wax provides a tight wine seal to prevent oxidation and preserve the wine’s quality.
Different types of corks, including synthetic ones, can also benefit from beeswax treatments, making it a versatile and valuable material in various applications beyond food wraps.
Learn More Uses for Beeswax
Creating your own beeswax food wraps is a simple yet powerful step towards a more sustainable lifestyle. Not only do you reduce plastic waste, but you also discover new uses for beeswax in your daily routine. From wrapping food to covering bowls, these wraps are versatile and eco-friendly.
Ready to make a difference? Try making your own beeswax wraps and explore more tips for sustainable living on our blog.
Stay in touch to get more updates & news on Buzz Feed!


